Jumping to the end the final result: This is a great way to quickly give a glossy finish to your prints and it does hide the layers somewhat, but getting good results necessitates having good starting material.
There’s a lot of talk about using an acetone vapor to smooth ABS prints so I thought I’d try it out. But instead of getting a presto steamer (tho I may try that one day) I decided to construct my own.
- Candle warmer, $2.50 at a Thrift Shop, $5 new.
- Wide mouth canning jar
- Lid for regular mouth canning jar
- Wire coat hanger
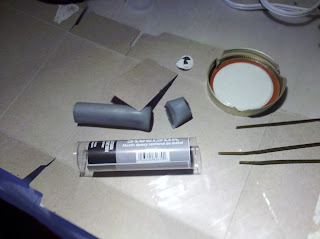
- SteelStick bonding epoxy putty stuff, $10 at Wal-Mart.
- Willing subjects to be tested on
Canning jars we have just lying around and since acetone doesn’t effect glass that’s what I’d be using. I tested the candle warmer and with nothing on it it gets up to about 110C so I figured it would work for this. But I couldn’t use hot glue or superglue because acetone does dissolve that, so I had to find something that would work. So it’s time to play with a new material.
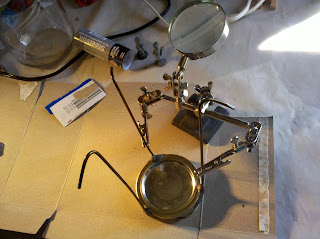
Epoxy brand SteelStick. Just cut off what you need, kneed it until it’s a uniform color, mould it, and let it set. Only thing is this stuff stinks to high heaven. Be sure you’re near an open door or window which you should be anyways because, you know, ABS, acetone, yeah. I also cut notches in the small jar ring to allow the acetone to flow under it freely when this is done. Then I stuck the lid to the ring metal side up and cut the coat hanger and stuck it to the sides of the ring with the epoxy.
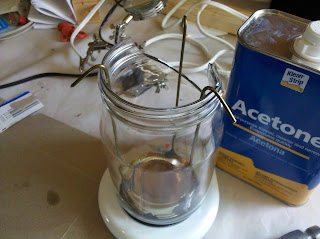
Thanks helping hands. next time around I’m going to punch holes or ridges or something in the ring and lid first because the extra width to the ring caused me to crack the jar when I tried putting it in.
Oops. I guess that means I’ll have to try again if I want to do this more after this. The top is left intentionally open because the acetone will condense and drip if there’s anything above it. Also, I really didn’t need to do 3 wires coming up since I had the ring, I just need a handle to pull it up by. Things to remember for version 2 if there ever is one.
Now, on to the victims.
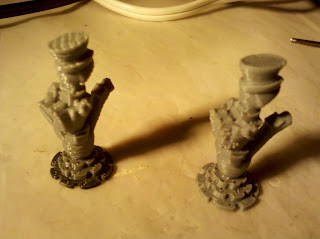
This is the queen from the Steampunk Robot Chess set by Dutch Mogul, a set that I want to print soon to add to my collection. I figured this one had enough detail to tell me what I wanted to know. The one on the left (that I didn’t finish cleaning the black out of the nozzle before printing) is printed at 0.35mm layers, the one on the right is 0.15mm. I wanted to see if you could smooth thick layers away. So I heated the acetone, loaded the ladies, and dipped them in the fog for a few minutes.
0.15 on the left this time, sorry about the confusion. The layers in the 0.35mm queen are still apparent, tho it is smoother, but there are parts of the 0.15mm layered ones that smooth out so smooth that it looks molded, particularly at the bottom. However, on the hat where the layer differences are very dramatic they are still apparent even at the 0.15mm layer height. But over all the effect is good and much more glossy.
At this point I just started throwing in anything I had around to see what would happen and to figure out how long to leave them in.
Acetoned on the left, plain on the right. Notice the glossy vs matte look. The smudge is because I left that one in the vapor for way too long. I wanted to see if it got any better and if the dramatic layers on top ever smoothed out and I can now say there is no appreciable difference to leaving the pieces in the vapor for any more than 2 minutes. Any longer and they become too soft to handle. Again, only put the parts in the vapor for 2 minutes or less, there is no benefit to leaving them in any longer.
Dual colored parts work just fine. In fact this one came out looking really good.
Vaporing a lithophane is actually a bad idea, tho because the glossy finish pics up reflections in the light in front of the lithophane ruining the effect. Won’t be doing that again.
The piece on the left was submerged in the vapor for 1 second. When that vapor is going it starts working quick, no messing around.
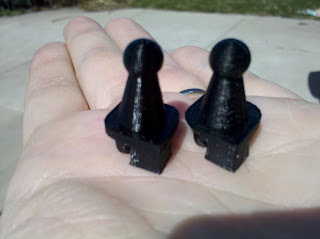
However, it doesn’t effect the assemble-ability of a whole chess set (I had an extra black hero).
Not sure if I’m going to make this a habit. it’s neat, but 0.15mm layers are already really smooth. All this does is make them… shinny. Which is okay if that’s the look you’re going for. I think I’m going to do it to the whole Steampunk Robot set when I print it, but then I’ll probably put it away for a while. Unless I find a good reason to do it some more. But, hey, now I’ve got a bunch of
junk to sell in my store. (I’m keeping the chess set.)
